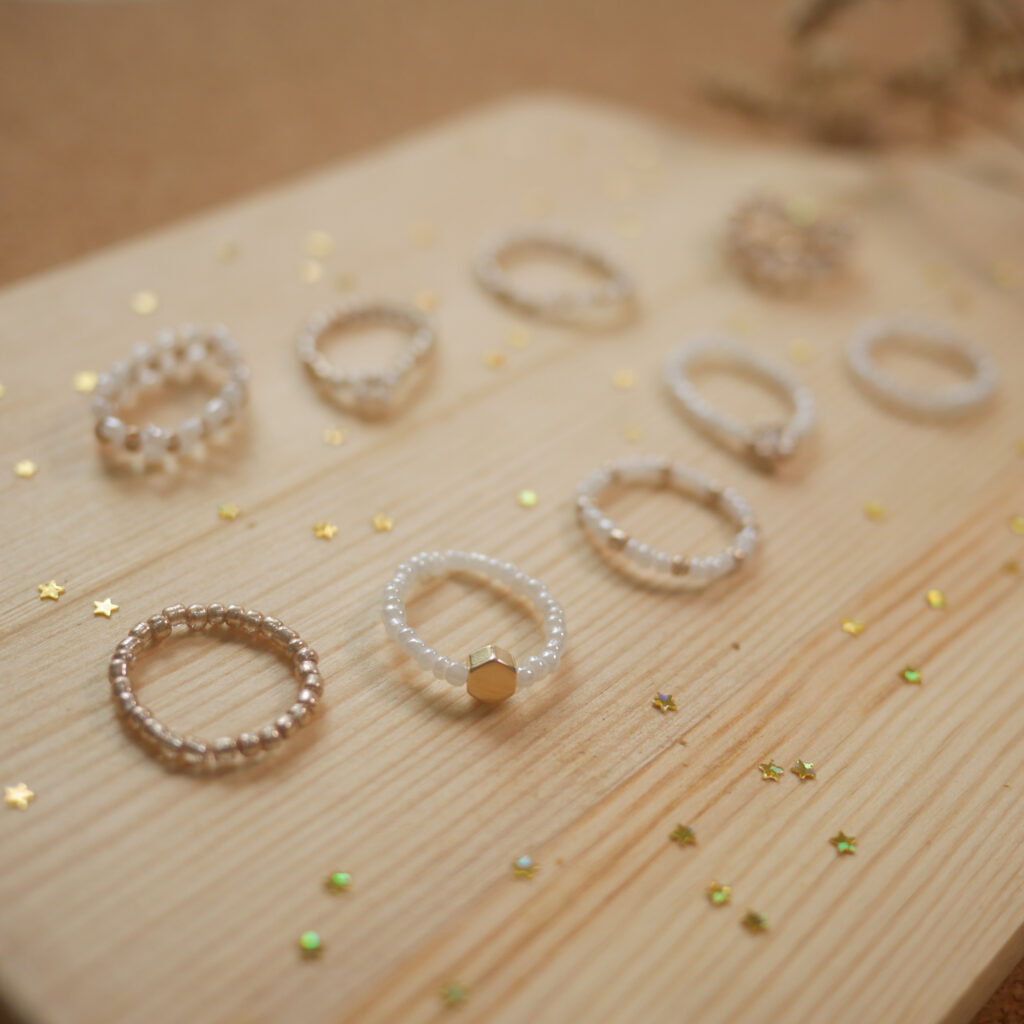
HAY, how art you? I’ve been really into making DIY beaded rings using seed beads recently. Stringing those tiny beads one by one to form beautiful patterns is a really therapeutic process! In this article, I wanted to share how I made a set of gold and white beaded rings. The designs are minimal and easy to create, so keep reading if you’re interested!
***
Video Process
Check out the following video to watch the beading process and DIY with me!
DIY Beaded Rings – Supplies I Used
PandaHall Selected has very kindly sent me these beading supplies a while back, and they are great for beginners to start a beading hobby.
Besides these supplies, it is also helpful to prepare small shallow dishes (to hold beads), washi tape (to close off one end of the cord and prevent beads from sliding off), scissors, as well as a soft surface to work on (fabric, cork board, etc). The soft surface prevents fallen beads from rolling away and disappearing into an unknown dark corner of your room (been there, done that).
DIY Beaded Rings Design 1 – Simple Pattern
Preparation
To begin, I prepared the white and gold seed beads in two little plates (I was using sauce dishes) so that I can access them more easily. Then I cut around 30cm of beading cord and pasted washi tape on one of the ends to prevent beads from falling out.
Building the Pattern
During the demonstration in the video, I beaded three white beads followed by one gold bead to form a simple pattern. Then I repeated the process until I think that there are enough beads to form a ring.
Determining the Ring Size
I don’t have a specific measurement for ring sizes, instead I just twist the cord around my finger to check if it fits. If you are unsure about ring sizes or making rings as gifts for friends, using beading cord that is stretchable will be more ideal.
Finishing the Ring
To finish the ring, I put the open end of the cord through all the beads again. This makes the ring stronger, and it won’t break as easily. Just keep going until the both ends of the cord are coming out from the same gap between two beads.
Once that is done, I tie two to three regular knots to pull the ring tight. Some people recommend applying a little glue on the knot to make it extra secure, but I haven’t tried doing that yet (I’m too lazy to…). Then, I push one end of the remaining cord through around three beads to the left, and the other end through around three beads to the right. This step can be a little challenging especially if the cord is not stretchable like the one I’m using, but it is possible with some patience and time (and some eye-squinting). Finally, you can trim off the excess cord and if there are still any cord ends poking out, push them into the neighbouring beads to hide them.
This is the easiest way of making a seed bead ring and with this method, and you can make solid-coloured rings or change the beading pattern to create new designs.
diy beaded rings design 2 – daisy flower
Getting Started
To start, decide on the main colour of your ring. I picked white, and strung white beads to cover about half of the ring. You can also, go for an alternating pattern or any other patterns you can think of!
Making a Beaded Flower
Next, it’s time to make a beaded flower at the centre of the ring. To start, bead six gold beads (or choose your own colour for the flower) to form the flower petals. Next, grab the end of the cord and push it through the first gold bead that was strung. Pull the cord tight, and then a flower will be formed. Then, bead one bead for the centre of the flower. I picked white for my flower’s centre. With the white bead at the bottom of the flower, push the cord through the gold bead on top. I would recommend watching my demonstration videoto watch the process for this step. After pulling the cord tight, the flower will be completed!
Finishing the Ring
Then, continue to string white beads to cover the other half of the ring.
To finish the ring, I used the same method as explained in Design 1. First, put the end of the cord through all the beads again. Upon reaching the flower, only string the cord through the the bead at the middle of the flower. Continue through the rest of the beads until both ends of the cord are coming out from the same gap. Tie knots to secure, slip the cord ends into neighbouring beads, snip off the excess, and voilà!
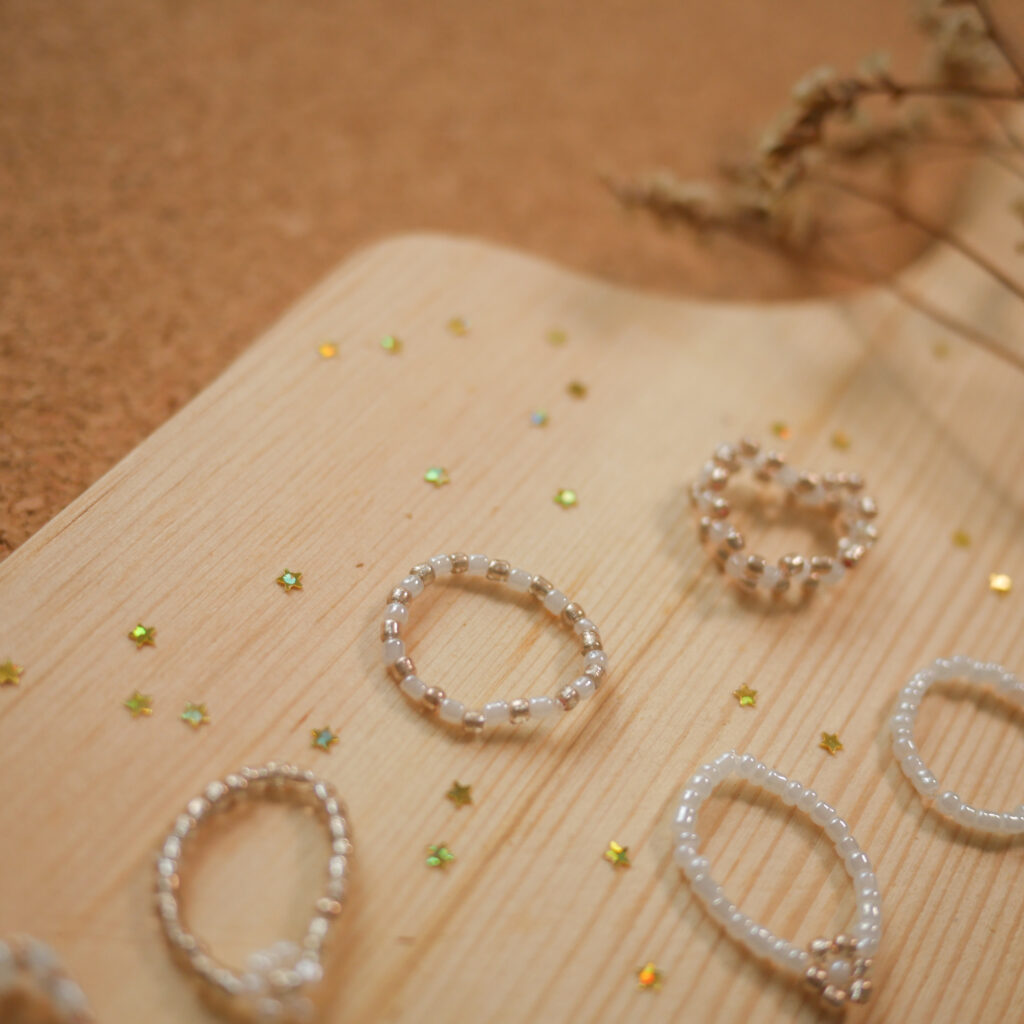
diy beaded rings design 3 – Using a Charm or Different Bead
Charm Ideas
For the third design, I used a hexagonal gold bead as the centre of the ring. Check out some of the following charms for more ideas for your own rings.
Making the Ring
Decide on the main colour or pattern for your ring. I decided to go with white since it contrasts well with the gold hexagonal bead. As with Design 2, just string beads to cover about half of the ring. Then, I inserted the charm and continued stringing white beads until there are enough beads for the entire ring. The finishing method is the same as the previous rings.
diy beaded rings design 4 – Linked
The last design is slightly more time-consuming to make, but the steps are pretty simple and repetitive. Both ends of the cord need to be free so remember not to use washi tape to block off one end this time.
Building the Linked Pattern
To start, I beaded four beads, alternating between white and gold. The first and third colour will form the external rows while the second and fourth colour form the internal row. Take the other end of the cord and put it through the last gold bead. Pull the cord tight and you should see a pattern that looks like a plus sign.
Next, bead white beads on both ends of the cord. Then, string one gold bead on one of the ends, and it doesn’t matter which end you choose. Take the other end of the cord and put it through the gold bead and pull it tight. Then, repeat this step and continue building the pattern until there are enough beads for the entire ring.
Finishing the Ring
To finish this design, insert one white bead onto each end of the cord. No gold bead is needed this time. Then, take the cord on the right and string it through the first gold bead at the other end, towards the left. Take the cord on the left and string it through the same gold bead, this time towards the right. Pull the cord tight and the ring will be connected.
Tie two to three knots and stuff the loose ends into nearby beads to secure the knots. Trim off the excess cord and the ring will be done!
More DIY Ideas
Subscribe to my YouTube channel for more DIY projects! Check out these videos for some inspiration:
***
If you enjoyed this article, share the love with your DIY pals! To stay updated on future blog posts, subscribe here.
Disclaimer: Some of the links above are affiliate links, meaning I earn a small percentage of commission via those links, but it doesn’t cost you anything extra!
Enjoyed this post? Spread the joy!
☆ Pin this image to help this article reach more people. ☆