HAY, how art you? Since my previous attempt at making DIY beaded rings using seed beads, I’ve been exploring other beaded jewelry crafts. Pinterest is a treasure trove of inspiration, and I chanced upon a few aesthetic designs that seem pretty simple to DIY. In this article, I wanted to share how I made three DIY beaded necklaces that are Pinterest-inspired. The designs are definitely beginner-friendly (I’m a beginner too!), so keep reading if you’re interested!
***
DIY Beaded Necklaces – Video Process
Check out the following video to watch the beading process and DIY with me!
DIY Beaded Necklaces – Supplies I Used
PandaHall Selected has very kindly sent me these beading supplies a while back, and they are great for beginners to start a beading hobby.
Besides these supplies, it is also helpful to prepare small shallow dishes (to hold beads), washi tape (to close off one end of the cord and prevent beads from sliding off), scissors, as well as a soft surface to work on (fabric, cork board, etc). The soft surface prevents fallen beads from rolling away and disappearing into an unknown dark corner of your room (been there, done that).
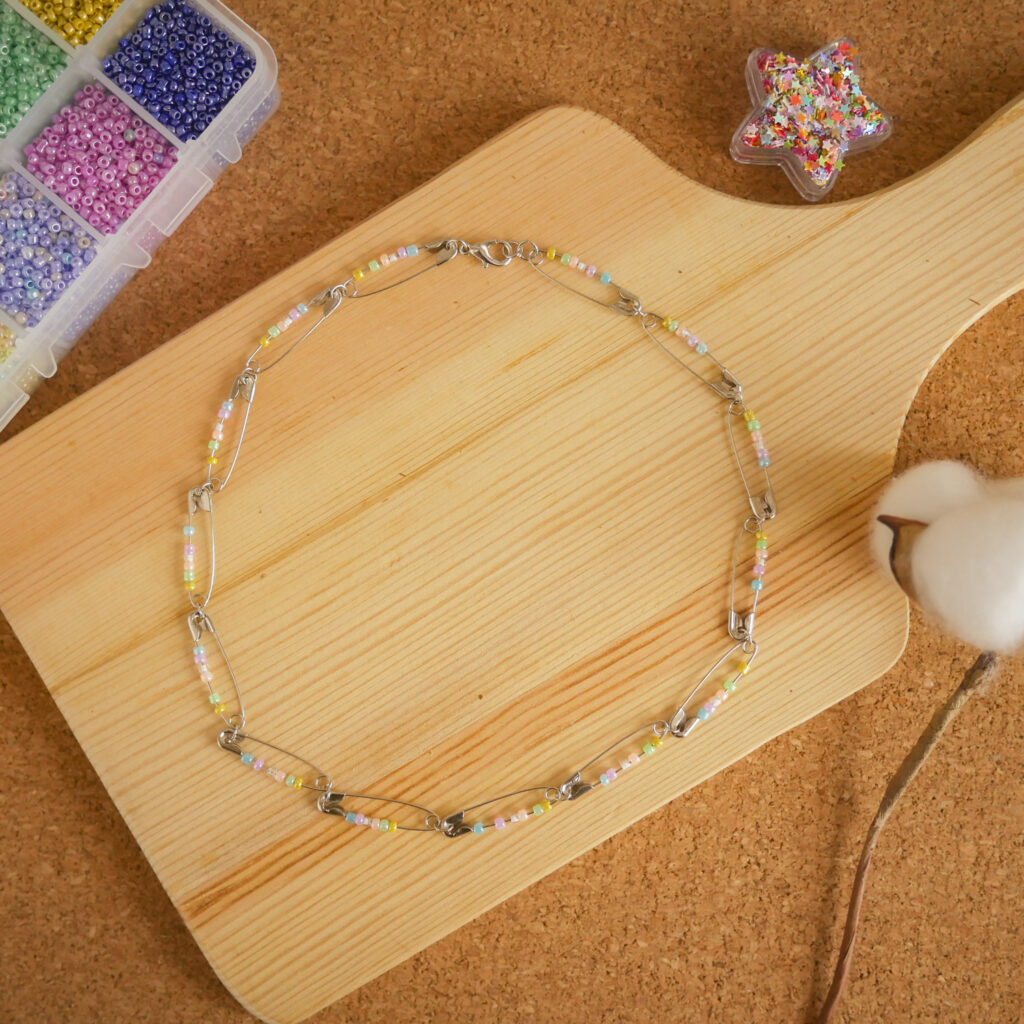
DIY Beaded Necklaces: 1) Safety Pin Necklace
Preparation and First Step
This safety pin necklace looks complicated at first glance, but it’s the simplest to make! For this design, prepare sufficient safety pins and jump rings. Connect two safety pins tail to head using a jump ring. As you connect, ensure that the opening of the safety pins are facing the same direction. Repeat this procedure until the necklace reaches your desired necklace length.
My DIY necklace is made up of 14 safety pins that are around 2.8 cm long, and it falls nicely on my collar bones (choker style).
Finishing the Ends
Connect one jump ring and one lobster clasp on one end of the safety pin necklace. On the other end, connect two jump rings. Check if your necklace fits and add or remove safety pins if needed.
Adding the Beads
Pick a colour scheme for the beads you wish to use. I picked out pastel colours as I did not want the necklace to turn out too “grungy“. Then, insert a few beads on all the safety pins to finish this simple but aesthetic necklace!
Pinterest inspiration:
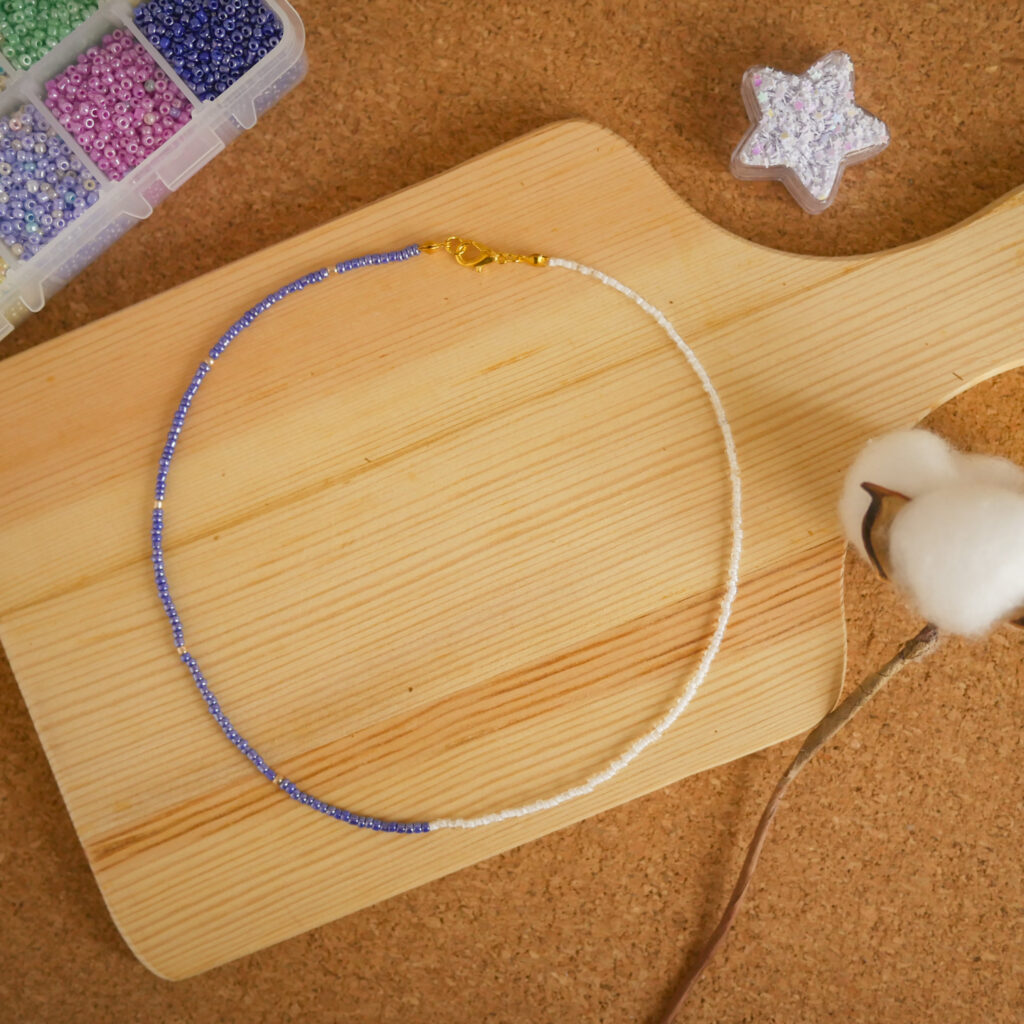
DIY Beaded Necklaces: 2) Two-Colour Necklace
Getting Started
To start, decide on two colours you wish to use for your beaded necklace. I picked white and blue as I really love the high contrast as seen on Pinterest (see below for the inspo photo!).
Beading Process
This design is relatively simple as well! Start beading beads of one colour until half of the necklace is filled. Then, continue beading with beads of the other colour until the necklace reaches your desired length. Also, I added one gold bead for every twenty blue beads as an accent colour.
Finishing the Necklace
Finishing the necklace is the hardest part for me, as I am still new to using jewelry findings like crimp beads and clamshell covers. Watch the DIY video for a clear demonstration of how to finish the necklace.
Pinterest Inspiration:
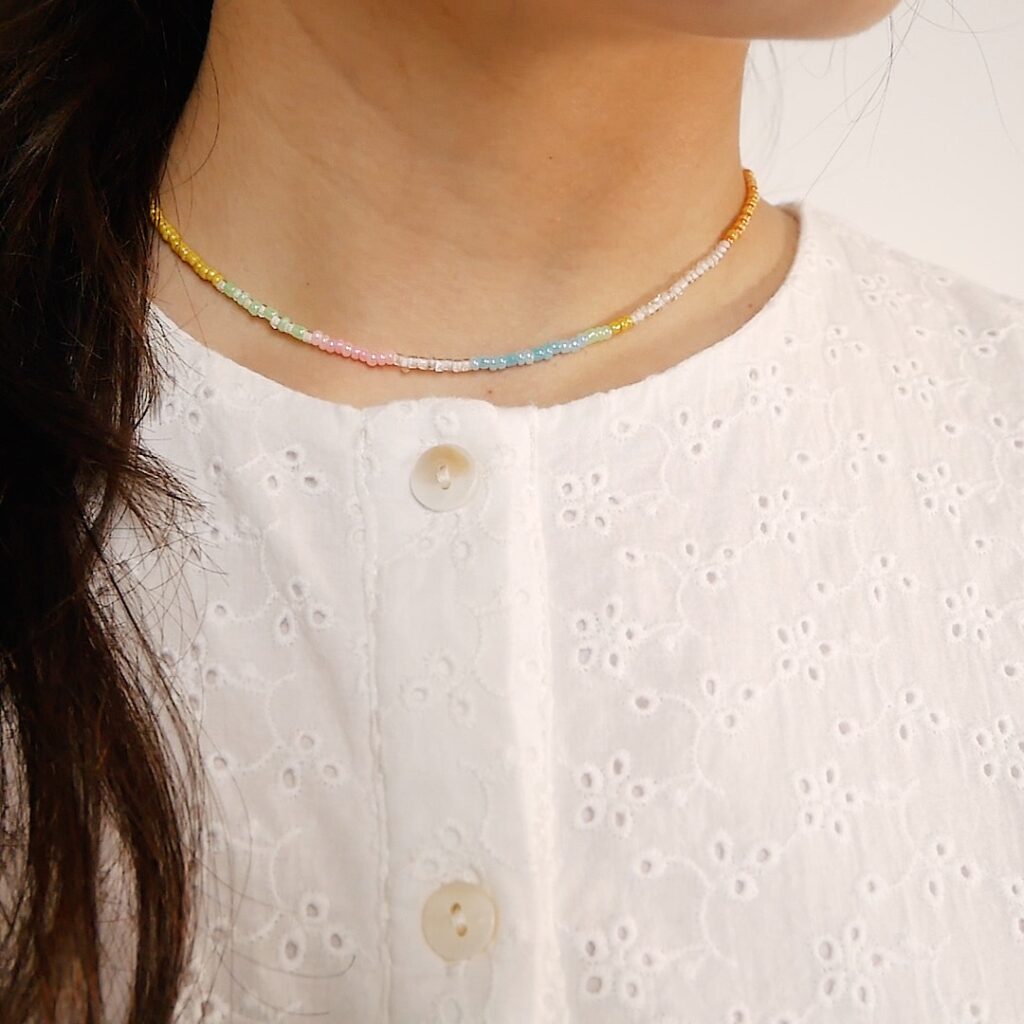
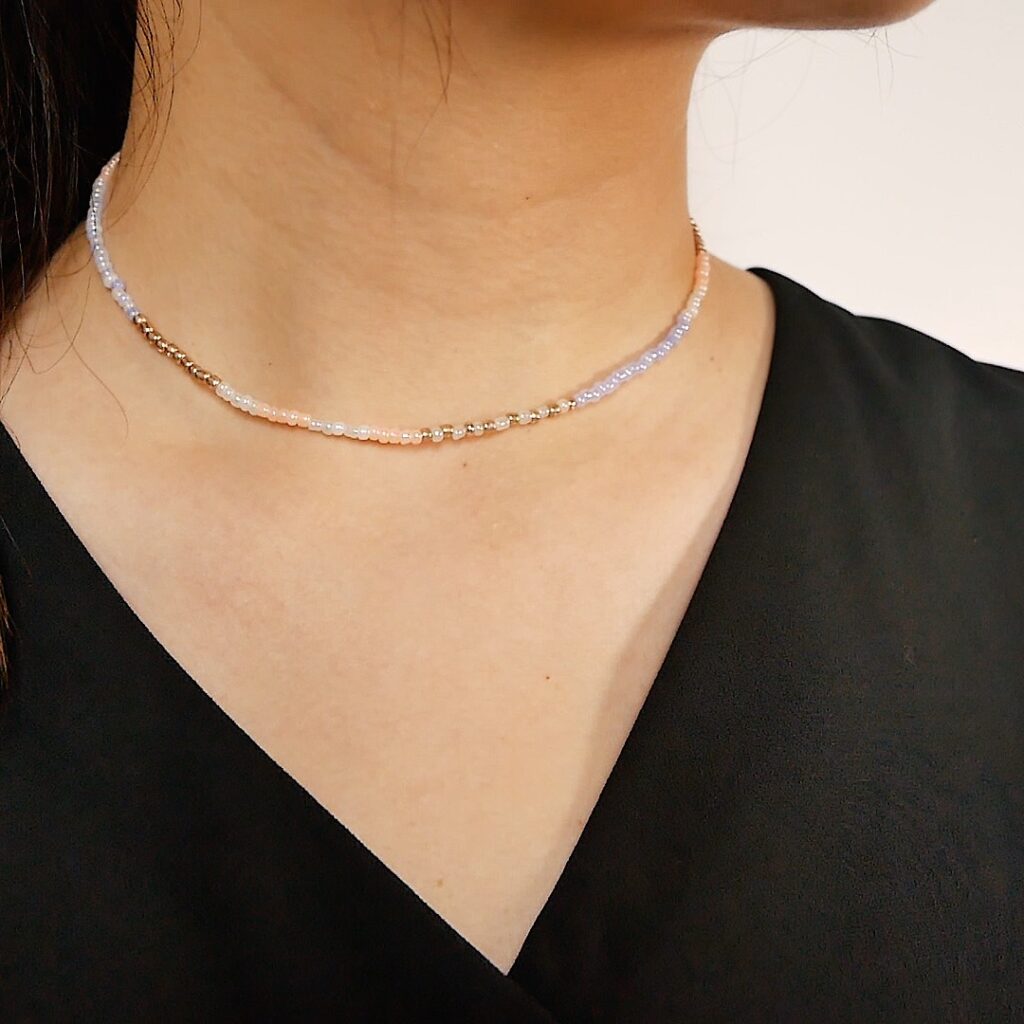
DIY Beaded Necklaces: 3) Random Pattern Necklace
Getting Started
This design is pretty self-explanatory! The hardest part is definitely nailing down a colour combination, especially if you own beads of various colours. It was hard to decide, hence I decided to make two necklaces. I settled upon a bright, summery rainbow colour combination, as one as one with purple, peach and gold.
Beading Process
As you bead, vary the number of beads for each colour to create a random pattern. You can also bead with alternating colours for a few sections.
Finishing the Necklace
Once there are enough beads to make a necklace of your desired length, finish the ends with clasps and jump rings. Watch the DIY video for a clear demonstration of how to finish the necklace.
Pinterest Inspiration:
More DIY Ideas
Subscribe to my YouTube channel for more DIY projects! Check out these videos for some inspiration:
***
If you enjoyed this article, share the love with your DIY pals! To stay updated on future blog posts, subscribe here.
Disclaimer: Some of the links above are affiliate links, meaning I earn a small percentage of commission via those links, but it doesn’t cost you anything extra!
Enjoyed this post? Spread the joy!
☆ Pin this image to help this article reach more people. ☆