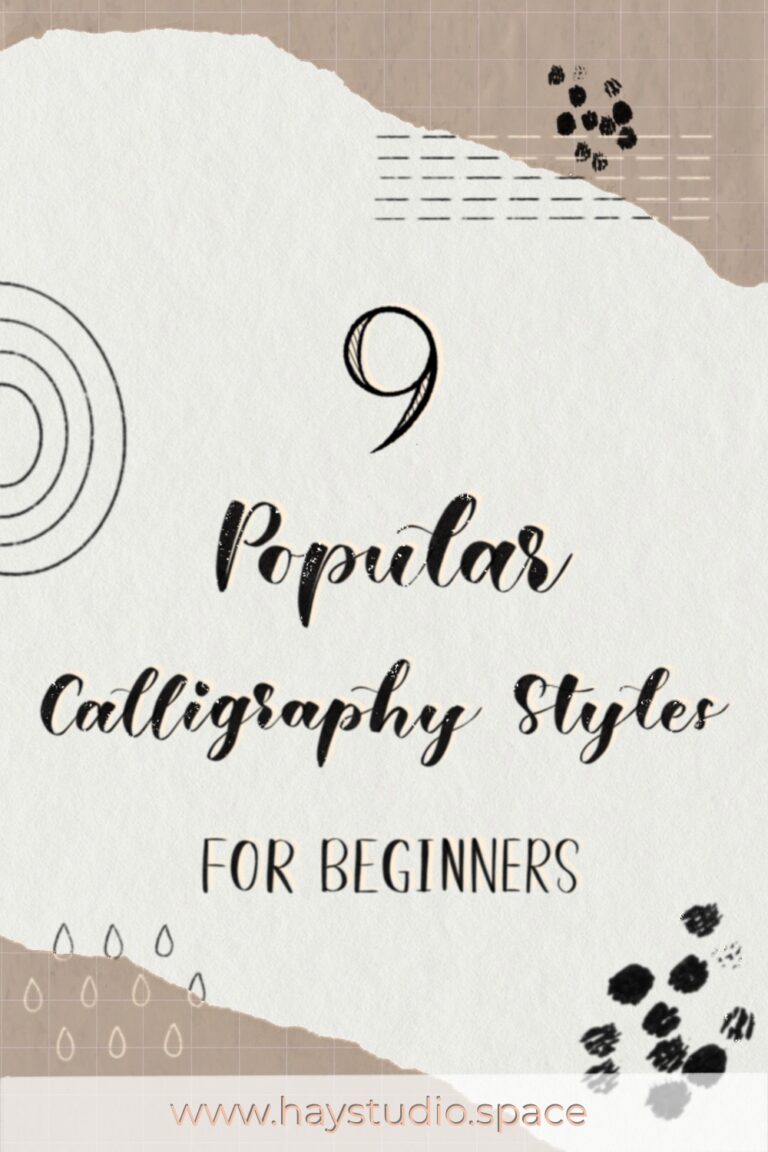
HAY, how art you?Have you developed your unique calligraphy style? I remember struggling with finding mine when I first started out with this art. I also assumed that I have to design my calligraphy in a completely different way if I want to create a brand new calligraphy style. After lots of experimentations, I have found that we can alter a few properties of the letters to give life to a brand new style. In this article, I have put together a guide on how to craft 9 popular calligraphy styles for beginners. Get your favourite calligraphy tools ready and explore the styles with me!
***
Before getting started…
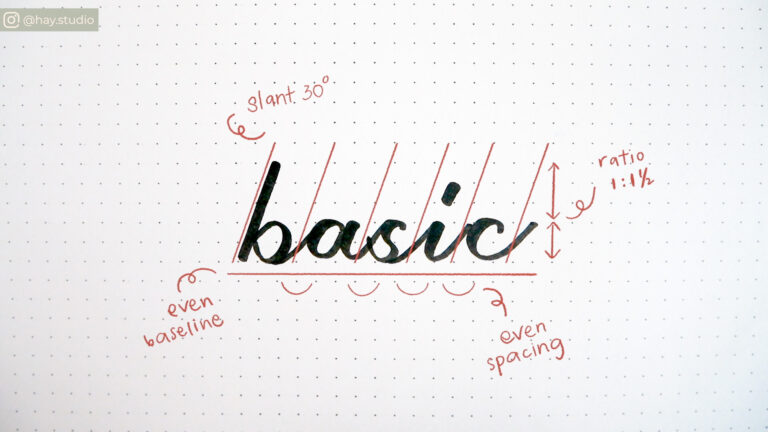
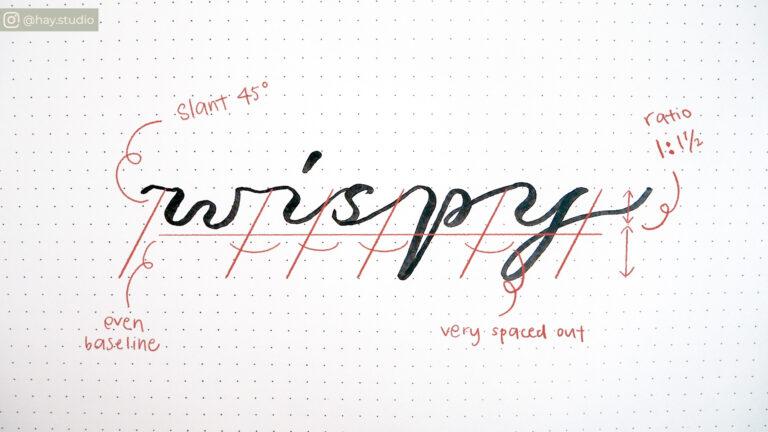
I have made a cheatsheet, which is the accompanying image, for each style. Here are the properties in the cheatsheet and their definitions:
Slant – the degree to which the letters are tilted to
Baseline – the line where all the letters sit on
Ratio – the ratio of the letters’ x-height to the ascenders or descenders
Spacing – the spacing between each letter
#1 Basic style for starters
First, try this basic style to create a foundation to derive new styles later.
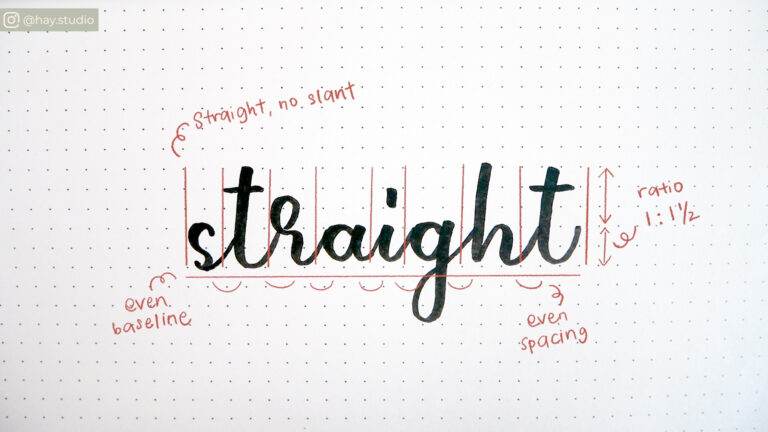
#2 Straight talkin’
To create the second style, let’s change one of the properties: the slant. After the slant is removed, the calligraphy is instantly revamped and delivers a more casual and modern vibe.
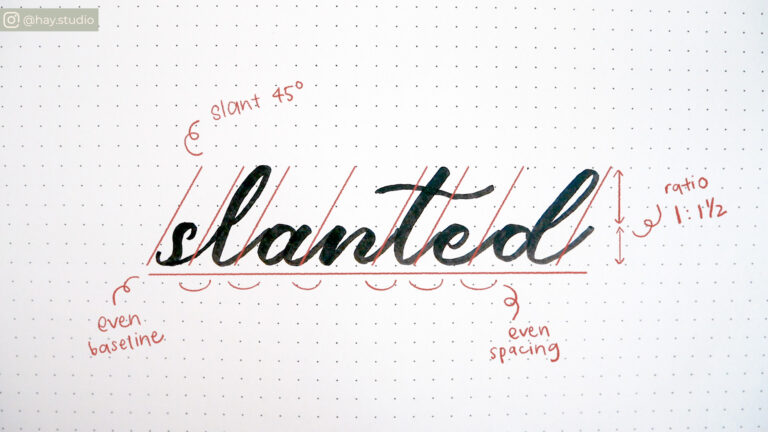
#3 Play with the slant
Instead of removing the slant, we can make the slant more pronounced. Try slanting the letters more than you did for the basic style, to about 45 degrees. In my opinion, this tiny tweak makes the calligraphy look classier and more elegant.
Easy Guide to Brush Pen Calligraphy – Get Started, Write Away!
For a more in-depth introduction to calligraphy for beginners, I recommend going through my Skillshare course, “Easy Guide to Brush Pen Calligraphy – Get Started, Write Away!“. If you are new to Skillshare, which is an online learning platform, you can get two weeks’ free premium subscription when you sign up with this link and access my course instantly.
#4 Wispy, dreamy letters
We can also change up the calligraphy style by adjusting the letter spacing. For this wispy style, all the properties remain the same as in style #3 slanted, except for spacing. Spread out the letters to create a dreamy look.
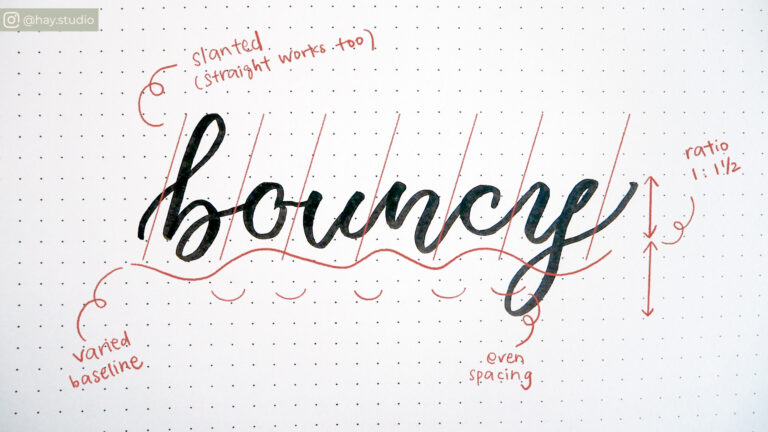
#5 A little bouncy fun
Next, let’s explore how the baseline can affect calligraphy. We have been keeping the baseline even for the above styles. Now, imagine that the baseline is converted to a wavy line. This bouncy style is more playful and adds a fun element to your work.
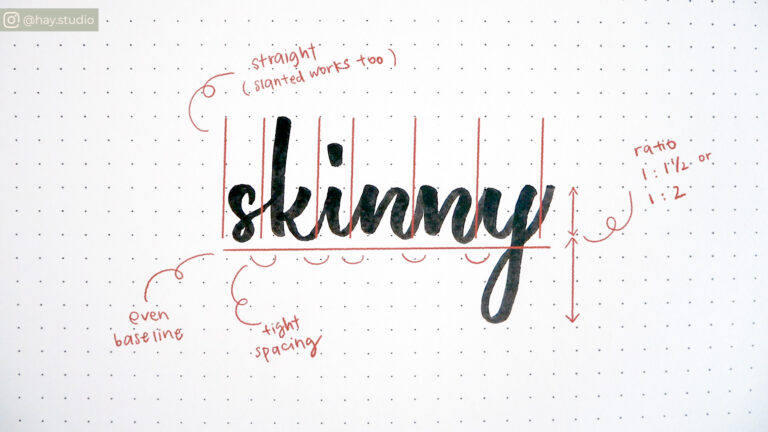
#6 Skinny love
Chances of this style going wrong are slim. Squeeze the letters close together with tighter spacing. Also, experiment with a 1:2 ratio by making ascenders and descenders (in this case, k and y) twice the height of the x-height.
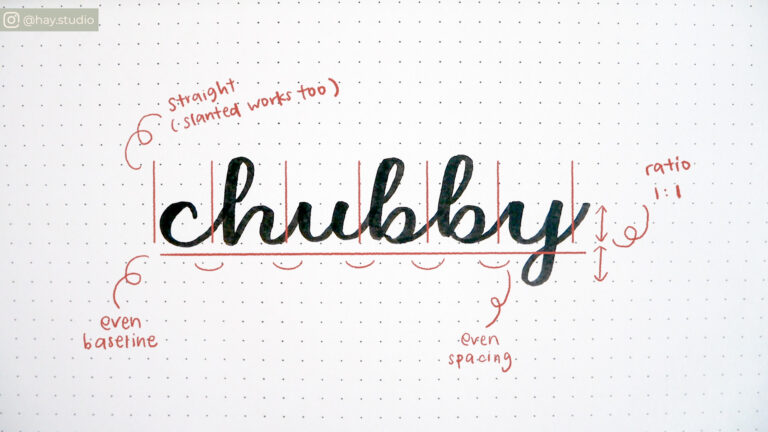
#7 Chubby bunny
On the flip side, we can create a cute and chubby style by changing the letter ratio to 1:1. This means that the height of the ascenders and descenders should be the sameas the x-height.
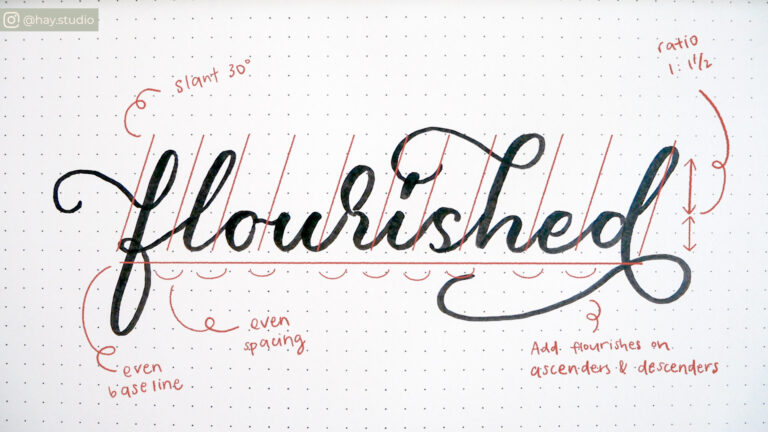
#8 Flourished elegance
I find flourishes really beautiful and elegant. For the best results, always plan and draft your flourishes in pencil first to ensure that the overall layout is balanced and harmonious. The best places to add flourishes are at the ascenders and descenders. However, I believe they can be added to any letter; the only limit is your imagination!
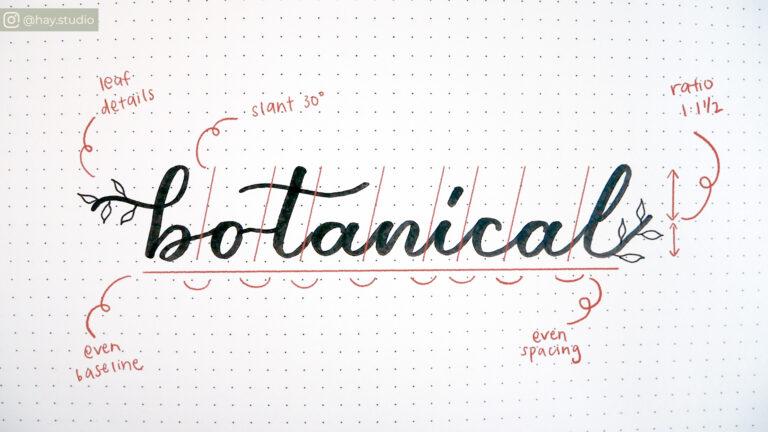
#9 Botanical embellishments
I’m sure you have seen them around – letters adorned with intricate florals and dainty leaf details. Calligraphy and botanical design definitely make a good pair! You can start by adding simple leaf doodles to entrance and exit strokes, before finding other creative ways to incorporate floral designs to your calligraphy.
***
As with all other things in life, the above guidelines are not hard and fast rules for crafting your personal style of calligraphy. Feel free to combine or change properties in different ways to experiment with new styles. If this article has inspired you in your creations, feel free to tag me at @hay.studio if you post your work on Instagram, I would love to check them out.
Watch this video for a demonstration of all 9 styles:
If you enjoyed this article, share the love with your calligraphy pals! To stay updated on future blog posts, subscribe here.
Disclaimer: Some of the links above are affiliate links, meaning I earn a small percentage of commission via those links, but it doesn’t cost you anything extra!
Enjoyed this post? Spread the joy!
☆ Pin this image to help this article reach more people. ☆